Sweet and sour pickled bell peppers recipe

This recipe is adapted from the recipe found on Food.com. If you want to make a single jar batch this recipe is a winner. I made these pickles in bulk using the same proportions of ingredients as in the recipe above.

I try to support local businesses as much as possible. Usually I get my fruit and veg from an independent green grocer instead of from a supermarket. As a result I can usually negotiate bulk veg for pickles at a discounted rate. I bought a full crate of bell pepper for R120 and got 10 x 750ml jars of pickles out of this batch.

Because I didn’t use a fixed weight of peppers (you won’t know how much you have until the peppers have been cut up and added to the jars) I made a couple batches of pickling liquid with the same ratio of ingredients as I went. There was about a cup of pickling liquid left at the end which I added to a sterile jar with some spices and will use it as a base for salad dressings in the future.

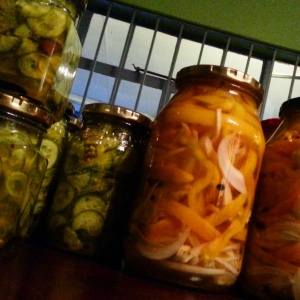
Sweet and sour pickled peppers

Sweet and sour pickled peppers

Ingredients:

Bell peppers sliced into strips (it looks better if you use a mix of red, green, yellow and orange)
Onion (about half the volume of the peppers)

Ratio of pickling liquid per 750ml jar
1 cup sugar
1 cup water
3/4 cup distilled white vinegar
1/2 cup cider vinegar
1/2 teaspoon salt

Spices:
2 bay leaves
6 – 8 peppercorns
1/4 tsp mixed black and yellow mustard seed
1/2 clove thinly sliced garlic
1/4 tsp celery seeds


Method:

Sterilise canning jars
Slice peppers and onions into strips
Add the spices as above to EACH jar
Alternate layers of peppers and onion to the jars, my family prefer more onion in the jars as they take on the flavour of the peppers while maintaining a delicious crunch
Pack the jars quite tightly as the pickles will float as they soften leaving quite a bit of space in the jar
If you’re making multiple batches of pickled peppers, make triple or quadruple batches of the pickling liquid at a go
Mix all the pickling liquid ingredients in a non-reactive pot and bring to the boil
Ladle the boiling liquid into the jars to cover the peppers completely
I tend to fill my jars to the brim to avoid air in the jars and thus let the pickles last a bit longer

Let the pickles sit for at least a week
Once you open the jar and have scooped out the first serving of peppers, top up with a layer of olive oil and store in the fridge
Eat within a month

Bread and butter pickles recipe

This is an adaption of the recipe from Simply Recipes

Ingredients
4 punnets (about 1,5kg) of gherkins (pickling cucumbers)
2 white or yellow onions, thinly sliced
2 heaped tsp himalayan rock salt (can use Kosher salt as a substitute, regular table salt has additives in it that will turn the pickles dark and muddy the color of the pickle juice)
1 1/4 cup white grape vinegar
1 cup apple cider vinegar
2 1/4 cups sugar
1 Tbsp mustard seeds
1 inch cinnamon stick
6 allspice berries plus a pinch of ground allspice
6 whole cloves plus a pinch of ground cloves
1/2 teaspoon turmeric

Method

Sterilise your pickling jars
Clean the cucumbers well and slice into wafer thin slices with a mandolin
Finely slice the onion with a mandolin
Mix the onions and cucumbers together until they are evenly distributed. I didn’t sweat my cucumbers with salt and ice as they were sweet and didn’t have the slightest bit of bitterness to them. If you’re using heirloom cucumbers they can tend to be a bit bitter, in which case follow the instructions on the Simply Recipes page to remove some of the bitter liquid from the pickles before continuing, and leave the salt out of the pickling liquid.

Mix the vinegar, sugar and spices in a non reactive pot and bring to the boil
Scoop out a half ladle of the pickling liquid into your canning jars making sure to distribute the whole spices evenly between the jars
Fill the jars with cucumbers and onion
Fill the jars to the brim with the boiling pickling liquid, and seal immediately.
They will be ready to eat withing 48 hrs, but give 2 weeks for the flavours to properly develop
Once opened store in the fridge and eat within a month

This recipe made 8 x 375ml jars.

My family have already put in their orders and will be getting pickles in their Christmas gifts.

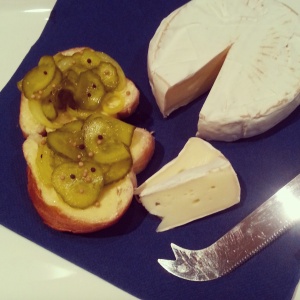
Bread and Butter pickles

Bread and Butter pickles

8 Things Not To Say To Lesbian Couples Who Have Kids

A funny (funny peculiar not funny ha-ha) thing happens when you aren’t a typical cisgendered heterosexual person; people feel that they have the right to ask deeply personal questions. Furthermore they also assume that you are obligated to provide them with an education on the object of their curiosity. This happens to me a lot and I know many people have the same experience whether it is because of their sexuality or because of having had fertility treatments. This post may be a bit ranty, proceed with caution.

So here are a couple things that you should really not say to a lesbian couple who have kids:

  1. Oh did you adopt?

    In South Africa, adoption is not an easy process. Caucasian babies up for adoption are rarer than hens teeth and those that do come up for adoption are usually placed through a Christian organisation, which means the likelihood of the child/ren being placed with a gay couple is almost 0. The number of children needing adoptive homes is astronomical but the system to put those children into homes is a bureaucratic nightmare. Go read up a bit about adoption, educate yourself. Ignorance is not a valid excuse for being insensitive. (Often this question comes with a story of a friend/cousin/colleague/friend-of-a-friend/Angelina Jolie who adopted)

  2. So how did you have kids?

    I am really not interested in discussing the details of our reproductive interventions with anyone that asks. Sometimes another lesbian couple or infertile couple will ask because they are in the family planning phase too and in that case I will discuss every detail of reproductive options and what we did, but as a general rule my answer tends to be “we had help from a doctor” and I leave it at that.

  3. Oh so did you do IVF?

    IVF is not the stock standard method of Artificial Reproductive Technology for lesbian couples. Usually people would try artificial insemination (AI) first. IVF is very expensive and requires a lot more medical intervention.

  4. Wasn’t it expensive?

    Again, none of your business.

  5. Who’s the father?

    This is without a doubt my biggest bugbear question. By asking this you are completely erasing the validity of our family structure. There isn’t a father. There are two moms. There is no, never was, and never will be a father (unless one of us decided to transition but that is a completely different can of none of your business). We did have a donor who supplied a genetic contribution to help us create our kids.

  6. So did you use an anonymous donor, so what you picked them out of a book or something?

    Good heavens! Really? How many times must I repeat… it’s none of your business! Donor sperm can be either anonymous or from a known donor. Families can choose to have any spectrum of involvement with the donor from absolutely none to have them actively involved in the kids’ lives. This is entirely based on what works for that specific family and they have absolutely no obligation to explain their family structure to anyone.

  7. So who is the mom?

    Uhm… two moms.

  8. I mean who’s the real mom?

    Me: Looks at wife…touches her. Looks at self…prods self. “I’m quite sure we’re both real, thanks.”

    Getting caught up in the thought process that genetics = real family is very short sighted. There are many families who don’t share genetics. It doesn’t mean they are any less real. Think about it for a moment…


Thanks for bearing with me being a ranty-pants.

So… if you are a gay/lesbian couple who are looking to start a family there are a lot of resources with info about how to go about it. A good place would be to contact your gynaecologist or a fertility clinic. You can also speak to Medfem, Vitalab and BioART (all of whom are gay friendly) in Johannesburg. For gay couples looking for surrogacy options try Nurture.

Infertile couples looking for information and support can try the Fertilicare forum. It was a source of endless support for me through our TTC (trying to conceive) journey. There is also a Rainbow Room for LGBT couples, although I found the entire community supportive and have made some awesome IRL friends through the forum.

There are very few specific resources on South African options for gay/lesbian couples wanting to start families. Luckily we do live in a country where same-sex couples have full parental rights, however it is a good idea to be married beforehand to prevent complications with registering births etc. As much as we live in a country where our families are legally protected by the constitution there are a couple stupid bureaucratic hiccups in the system such as two ID numbers of the same sex can only be added to a birth certificate of a child at the Home Affairs Head Office in Pretoria which means there will be a delay in getting the birth certificates.

Do you have any questions? Feel free to ask… ha ha ha!


Kombucha… it’s like tea but not quite

Of all the info about me in my Twitter and Instagram profiles, the thing that gets the most interest is the fact that I brew my own kombucha.

My love affair with kombucha goes way back to when I was small and living with my grandmother. I remember her brewing all sorts of odd things on top of the cupboards in the kitchen including a very potent alcoholic ginger beer. Now you may be rolling your eyes and thinking “ah she comes from a long line of hippies” but you couldn’t be more mistaken. My granny was an old-school, British school ma’am. She was a teacher and at one of the schools she taught at the kids had, not so subtly, given her the nickname “The Dragon”.

To me though she was just my granny, and also one of the most magical people I know. My love of cooking was nurtured in her kitchen from the time I could barely reach the stove top while standing on a chair. She let me make scrambled eggs and help with food prep. We would also bake together, filling endless tins with a variety of cookies. My favourite were the ones with raisins in them that had been rolled in cornflakes, and jam tarts filled with apricot jam. I would bite the jam tarts open and then dip them in my tea, the tea would melt the jam and I would drink the sugary concoction out with the unadulterated glee that only a 5 year old can possess, hoping that I could eat the tart before the whole mess fell apart in my hand.

Now as an adult, going back into those memories of childhood, I remember my granny having a bucket with a weird rubber thing in it that she made a weird fizzy drink with. A couple months ago it hit me with lightning clarity that it had been kombucha that she had been brewing.

I wish I could have asked her about it. Sadly she passed away and with her went a lifetime of knowledge. The loss of her still catches me unawares in moments like this, wanting to ask her about her kombucha instead of finding all the info online.


So, nostalgia aside, what the is kombucha?

Kombucha is a fermented tea. It can be made with any assortment of teas and herbal infusions. I have even had coffee kombucha which blew my mind and left my taste buds tingling with delight. My own preference is for rooibos (red tea) kombucha but you can make it from black teas like a nice smoky oolong, green teas, your stock standard Ceylon tea, or even an herbal infusion like mint or Echinacea.

All you need to get started is a SCOBY.


What the hell is a SCOBY?

SCOBY is an acronym for a symbiotic culture of bacteria and yeast. Basically it is a rubbery white to cream coloured fungus-like thing. Sounds grand doesn’t it? Don’t worry it is really rather innocuous and not at all gross.


Where to get a scoby:

If you live in the USA you’re in luck because you can buy a scoby easily online.

Here in the RSA though it is a bit more challenging. I got mine from a farmers market in Pretoria. Any foodie worth their salt will know of The Boeremark in Silverton. There is a woman there who sells scobys and kefir granules. Otherwise, find a friend who brews kombucha and beg a scoby off of them, with each brew cycle your mother scoby forms a new child scoby and thus you will eventually be inundated with the things. It is apparently also possible to grow a scoby from unpasteurised kombucha but this has varying success rates, we might be a bit more successful with this in SA as we don’t have the same food regulations as the USA and our commercial kombuchas are still alive.


What you need to make kombucha:

A fairly large (preferably glass) container

A scoby

3L of tea

2 cups of sugar

Half a cup of organic, unfiltered apple cider vinegar or 1 cup of your previous batch of kombucha


How to:

Thoroughly clean your glassware and anything else which will come into contact with your tea. You can use a mild solution of Milton’s and water, just make sure to leave everything to properly dry afterwards. I use hot soapy water and then rinse everything with apple cider vinegar as the acidity of the vinegar kills most nasties that could contaminate your kombucha. UNDER NO CIRCUMSTANCES SHOULD YOU EVER USE ANTIBACTERIAL SOAP, it will kill your scoby!

You can wash your hands well with a mild soap and then rinse with apple cider vinegar too. Just remember that the vinegar can be quite corrosive and if in doubt rather buy a box of non-latex gloves for food prep.

Boil water in a large, non reactive pot for 5min, allow to cool to 70’C, add the tea, allow it to steep for 5 min (or longer if you like a stronger tea), add sugar and then let the whole lot cool to room temperature.

Add your tea, and cup of kombucha or vinegar to your glassware and then gently try floating your scoby on top. Some scobys float, some sink, don’t worry too much as a new scoby will form on the top of your liquid but ideally you want your scoby to float as it protects your kombucha from nasties like aspergillus. The kombucha or vinegar makes the tea acidic and this helps to prevent bacteria from growing in your kombucha and makes a happy environment for your scoby to live in.

The next part is the hardest part, cover the glassware with muslin or cheesecloth (folded double), put in a cool dark place and ignore for 2-3 weeks. With it being winter here in the southern hemisphere I find brewing takes a little longer because it is cold. You can get fancy-pants heaters for your kombucha but I don’t bother, it will brew in its own good time.

To tell if it is ready, you can get fancy and test with pH testing kits and stuff or you can do like I do and use a clean straw to sample out a little liquid (use your finger to trap a little liquid in a straw and transfer to a tot glass) and have a taste. If it is still too sweet, leave it a while longer. So easy really.

Pour off your kombucha into a clean bottle with a tight fitting lid (you can use beer brewing bottles or be pleb like me and use an old Coke bottle or two) leave it in the fridge for a week and it will develop a nice fizz.

You can either store your scoby in the fridge in a cup of kombucha or immediately refill the glassware with new tea. Continuous brewing works a charm and leaves you with a steady supply of kombucha.


There is a lot of info about flavouring your kombucha, using alternative things to sweeten your kombucha and other methods over at www.kombuchakamp.com


A couple things to remember:

If you see mould, it looks like bread mould, growing on you kombucha you will need to throw the lot away and start again with a new scoby

The scoby lives off of the sugar in the tea and will use most of it up, as a result kombucha can have a slight alcohol content and also artificial sweeteners will not work for brewing kombucha.

It isn’t advised to drink more than a cup of kombucha a day as it is quite acidic


Sorry for the quality of the photos but it is almost impossible to take good photos of a dark liquid in a dark place.

Kombucha in a dark(ish) place in my kitchen

The mother scoby at the bottom and a new scoby growing on top

Thick child scoby disturbed after sampling the kombucha recently



Kiwi and Lime Marmalade

I did a little experiment in my kitchen and made up the single most delicious thing I have ever put in my mouth.

A couple weekends back we went for a trip to some friends of ours farm in Magoebaskloof. It was idyllic! Imagine an old open plan farmhouse with no doors that lock, hot water heated by a wood-burning donkey, and the only electricity being in the kitchen for the stove and a single light. We lived for the weekend in a blessed peaceful darkness that was broken only by the moon, a fire and flickering candlelight. Within moments of arriving I was scoping out the massive kitchen and planning where I would build a cupboard to store all the jams and preserves I would make from the fresh produce that abounds in that part of the world. I didn’t want to come home. Is it crazy that my heart’s desire is a little farm somewhere remote?


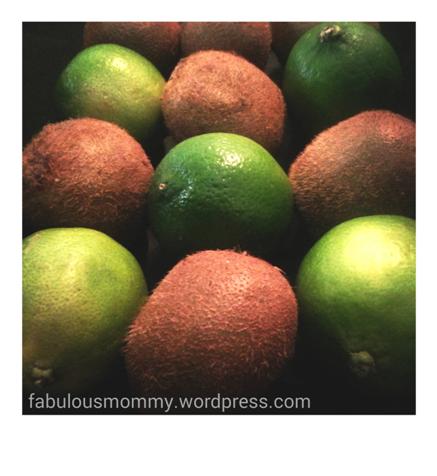
Over the weekend while we were there, the little town of Haenertsburg was holding their Kiwi and Fine Food Festival. Oh gee, whatever can a foodie do but enjoy the local hospitality. I will add for the record that I had the single best hamburger of my entire life at that festival. The fact that I could also get Jack Black lager on tap (my favourite craft beer) to go with my burger was enough to send me to foodgasmic nirvana. I however did not taste a single kiwi fruit, nor any other kiwi product of any shape, form or description. For a kiwi festival… it was a little disappointing. As we were leaving I bought a 2.5kg box of Kiwi that were horribly under ripe and schlepped them back home.

So what do you do with 2.5kg of under ripe kiwifruit? You make jam of course.

As with all fruit the pectin levels are highest before the fruit is fully ripe, even still I needed to let the kiwis ripen a week before making this jam. Also Kiwi don’t have terribly much pectin in them so you have to use extra. I made my own from apples but you could use commercially available pectin.

Recipe:

Pectin

1.3kg of green apples

1L water

2tbls lemon juice


  • Wash apples and then cut into chunks with skins and seeds
  • Add apples, lemon juice and water to a large pot
  • Boil for about 30min until the apples are soft and falling apart
  • Now the proper way to do it is to gently hang the pulp in a jelly bag or piece of cheese cloth for 24hrs to allow the fluid to drip out. This is the ideal way to extract pectin to make a jelly. Squeezing the bag or being otherwise ham-fisted will result in a cloudy jelly. Frankly I don’t have time for fuddy-duddy jelly making when my jam will get cloudy anyway when I add fruit in, so I strained off the liquid and sent the pulp through my Oscar DA 900 juicer. Wham… loads of pectin… no fuss.
  • Put the pectin in a pot and reduce the liquid down by half


Jam:

Pectin liquid as above +-400 – 500ml

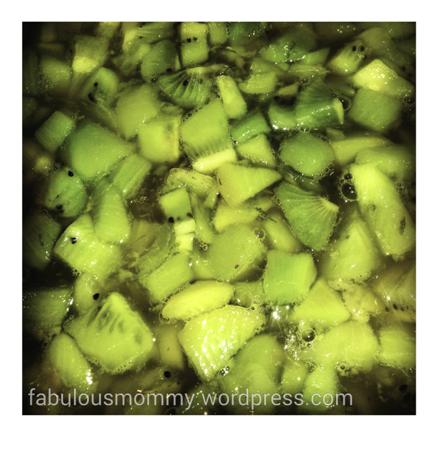
1kg of peeled and diced kiwi (1cm size cubes)

The zest and juice of 3 limes

2 cups sugar


  • Add all ingredients to a pot and boil it until setting point.

There are clever ways of using a candy thermometer to figure out setting point but I can pretty much do it by eye now, however if it is your first time making jam there are a couple tricks to being able to tell if it is ready. Firstly put a couple saucers in the freezer for later. Watch the jam boil, it will start off as a watery liquid with white foam on top and as the liquid boils off the bubbles become bigger and clear, the fruit is no longer floating on top but getting more evenly distributed through the jam and the whole mixture takes on a glossy appearance. Once it gets to this point you need to baby it a little. Take a teaspoon of jam and put it on an ice cold plate. It should hold its shape slightly and not run all over the plate. After a couple seconds if you push against it the blob of jam will wrinkle and look as if it has formed a skin. If it isn’t there yet, boil a little longer (5min) and try again.

So your jam is setting and ready to put into jars.

Now there is a lot of info online about home canning and how to prepare your glassware for storing jam. Ideally you should boil them in a canning pot and then fill them while still hot. I am lazy. I wash mine well with soap and hot water and then add a half a tot of vodka to the jar, close the lid, give it a good shake, pour the vodka into a tot glass, fill the jar with hot jam, and top it off with a layer of the remaining vodka before sealing. So far this method has proven rather successful so I’m sticking with it until I food poison myself. Remember to label and date your jams and use them within a year.


This recipe made 3 x 500ml jars of jam.


Now for a confession… the kiwi fruit cooked to a rather dismal shade of khaki so I added a drop of green food colouring at the beginning to preserve the jewel-like green of the kiwis. This is entirely optional so feel free to skip it if you want.


This jam is a burst of tangy sweetness that you could use in a variety of ways. Warm it up and blend it to a smooth consistency and use as a topping for a cheesecake, or eat it as is with warm crusty bread and some chevin. Sublime!